Table of Contents
This article is primarily about preparing soil before planting trees (ornamental or fruiting), hedging, roses, and other shrubs.
It won’t consider vegetable beds, where more work might be justified, or perhaps No-Dig methods.
Soil preparation is important because it helps strong roots to establish quickly.
If the roots struggle to settle in, the whole plant will struggle.
Like so many things in gardening, there is not one right way to do it, but there are some wrong-ish ways.
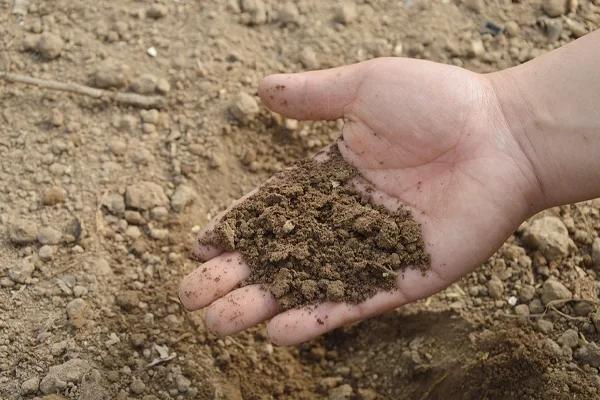
In most locations, you will be working with one of three general soil categories:
- Clay soil: Heavy, not very dark, cracks and crusts in dry weather, feels smooth when moist & you rub it between your fingers, you can make it into a sausage shape that won’t crack when you prod it.
- Good garden topsoil: dark and forms little crumbly clumps when moist. When you roll it into a sausage shape, it will crack apart when you prod it.
- Poor soil (sandy, chalky, or rocky): if your soil is light, gritty, and won’t form a sausage maybe unless it’s soaked, and the shape will just fall apart when you prod it.
Why is Soil Preparation Necessary?
The core reasons for soil preparation are:
- To break up soil compaction, thus opening the way for new roots to penetrate deeply.
- To remove weeds, grass, other roots, and large stones.
Digging in well rotted organic matter (like compost or manure) is optional.
Adding organic matter to the planting hole is helpful in many cases, unnecessary in some, and in the case of heavy clay, it is not really a good idea.
Is Soil Preparation Always Necessary?
No, soil preparation is often not practical in large scale field & forestry planting.
Sapling trees and hedging are planted en masse using the slit planting technique demonstrated in our Country Hedge Planting Film.
But wherever soil preparation is practical, it makes a huge difference.
If your garden soil is already rich and well cultivated, there is no need to add anything, just dig it over to break it up.
In your garden, soil preparation & improvement should always be feasible for your ornamental or fruiting plants.
They are significant investments in hardworking plants, and you want to see them have a strong start.
Is Digging in Organic Matter Essential?
The most important organic matter you add to the planting site is not what you put in the hole before planting, it is what you spread over the soil after planting, and every year or two thereafter: mulch.
Mulch can be almost any green waste, and unlike the well-rotted organic matter that you would add into the planting hole, mulch does not need to be decayed at all.
You only need to shred or chip woody material into little pieces.
What are the best tools for Soil Preparation?
The essential hand tool for digging over soil prior to planting is strong digging spade.
A fork is handy: you use the spade to move the soil aside, then the fork to break it up and mix it, especially at the bottom of the hole.
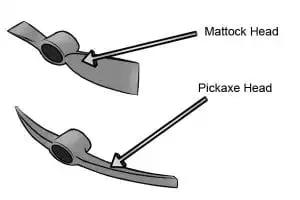
Many people prefer a mattock to a spade on rough ground with lots of roots.
If you have the strength for it, a pickaxe is also excellent for breaking soil compaction.
A pickaxe can penetrate deeply and lever up sections of soil like no other hand tool.
When using it this way, sink the head into the soil, then lift the end of the handle with your arm straight, acting as a hook, pushing with your legs, as if you were trying to step forwards and stand up tall at the same time.
Heavy Clay Soil is Special
There are some unique considerations with preparing heavy clay soil.
In short, we don’t recommend trying to improve clay soil by digging organic matter into planting holes or trenches.
Instead, (unless you are using a mulch fabric) apply mulch over the soil after planting, and every year thereafter: let the worms mix it down for you.
Soil Preparation to improve Good Garden Soils
- Soil compaction tends not to be a big issue on good topsoils due to all the soil life, so less effort is needed to work it over.
- Moving the topsoil to one side as you dig, you will typically reach the lighter coloured (which indicates less organic matter) subsoil somewhere between 30-60cm down (if you dig down more than about 75cm, and it’s still all lovely dark topsoil, great! You don’t have to add anything to such good soil).
- This subsoil level is where you want to use the fork or pickaxe to break up the compaction, and then mix in some organic matter.
As always, after planting, apply mulch around the area, and then yearly (unless you are using a mulch fabric).
Soil Preparation to improve Poor, Dry, and Chalky Soils
- Soil compaction is often somewhat of an issue on poor soils devoid of much soil life, but unlike clay they are easy to dig over at any time of year.
- These are the soil types where it really pays to mix in plenty (up to half of the backfill) of well rotted organic matter, as wide and deep as feasible.
As always, after planting, apply mulch around the area (unless you are using a mulch fabric).
You will often find that poor soils seem to “drink” mulch: it vanishes down into the soil in a matter of months, and so a twice yearly application may be necessary
Key Takeaways
Soil preparation is primarily in order to break up the soil and to remove weeds & other roots.
Digging in organic matter is not recommended for clay soil, optional for good garden topsoil, and recommended for poor, dry, sandy or chalky soils.
Clay soil should not be worked when it is wet in winter, so try to prepare it in advance of winter planting.
Whatever you do, the most important soil improvement is not really what you do at planting time, but the mulch you apply afterwards, which can be a mulch fabric, or an application of almost any organic matter one or twice a year.